


The Hitchhiker's Guide to the Containers: A Foolproof, Hands-on Docker Tutorial (Part 2)


Welcome to Part 2 of my shameless attempt at explaining Docker to beginners. I struggled so you don't have to!
In last week's article we covered what Docker is, some of its jargon, and why it outperforms VMs in many use cases in today's typical software development lifecycle. This week we'll go deeper into running Docker on our machines, all while figuring out the most interesting and useful underlying technicalities.

Getting started with Docker
If you don't have Docker installed on your machine, head over to the Docker Download page to get the version that will work on your system.
The Linux version is the easiest to install, given that Docker is built off of Linux utilities. On Mac and Windows, on the other hand, there are two main ways of using Docker:
Docker Desktop The newer and recommended version of Docker. It is a native solution that works directly along with your OS's processes, so we are free to interface with Docker with your favorite terminal and your favorite IDE/text editors.
Docker Toolbox This is an old version for machines that don't meet the minimum requirements for Docker Desktop. It is not a native solution as it runs on VirtualBox, so we are forced to use the tools that the Toolbox comes packaged with, making everything more cumbersome and prone to errors.
The main catch is that Docker Desktop is not easy to install on every system. While it is straightforward on macOS 10.13+ and Windows 10 Pro, the Windows 10 Home version needs extra attention.
Docker Desktop on Windows leverages Hyper-V, which is Microsoft's Type 1 hypervisor and only available on Windows 10 Pro, Enterprise, and Education. Fortunately, Windows Home supports Windows Subsystem for Linux (WSL), a Linux kernel developed by Microsoft that allows us to run Linux processes to run natively without emulation. Since March 2020, Docker Desktop supports WSL version 2 as a backend on Windows Home.
To install Docker Desktop on Windows Home we need to install WSL2 first, then install Docker Desktop specifying WSL2 as the backend during the installation process. we can find the whole process to install WSL2 here and the subsequent Docker Desktop installation process here. If you would like to see a walkthrough video of the installation process, let me know and I will work on making one available.
Once installed, we can open our favorite terminal and check that the installation went smoothly by typing
docker --version
If this returns something the likes of
Docker version 19.03.12, build 48a66213fe
we are good to go!
Note: In case you are unable to make it work on your machine or if you don't want to install anything yet, Docker also offers online playgrounds to run your code and everything you find in this tutorial would work the same.
Let's run our first container!
As we saw last week, to run a container we first need to find an image on the Docker registry. Like everything in the programming, Docker has a Hello World container that we can easily get from its Docker Hub page. As we can see on the website, the command we have to run is
$ docker pull hello-world
which will welcome us with an unsightly wall of output which looks like
Using default tag: latest
latest: Pulling from library/hello-world
0e03bdcc26d7: Pulling fs layer
0e03bdcc26d7: Verifying Checksum
0e03bdcc26d7: Download complete
0e03bdcc26d7: Pull complete
Digest: sha256:49a1c8800c94df04e9658809b006fd8a686cab8028d33cfba2cc049724254202
Status: Downloaded newer image for hello-world:latest
docker.io/library/hello-world:latest
We can see a few things that we need to cover, namely tags and layers.
We can check all the images that we have in our machine simply by running $ docker images and inspecting its output:
REPOSITORY       TAG        IMAGE ID        CREATED           SIZE
hello-world      latest     bf756fb1ae65    7 months ago      13.3kB
We can see that we have a hello-world image tagged latest, with a unique image ID (yours may be different) and it weighs only 13.3KB! That is where the gold is! Running a similar basic job using a VM would entail installing an entire OS just to output "Hello world!".
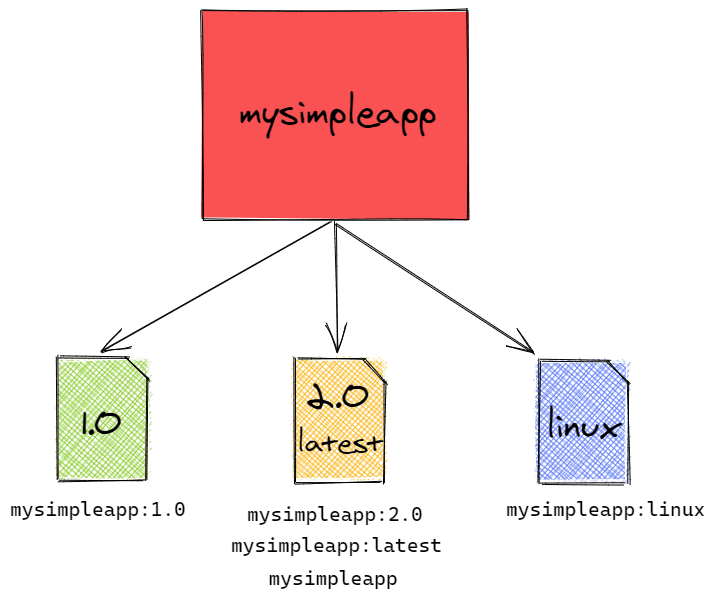
The first column of the docker images output is called repository. If you have ever used Git or GitHub, the name might sound familiar. In a Docker Registry, a repository is a collection of different versions of images that share the same base name. Each of the versions is identified by a tag, but images can have multiple tags as well!
In general, Docker images follow the naming convention of username/repository:tag. As a quick example, let's suppose that I built an image called mysimpleapp and I shared version 1.0 on the Docker Hub. You could get that image by running
$ docker pull antoniolofiego/mysimpleapplication:1.0
If we do not specify the tag portion, Docker will by default download the image that is tagged as latest. This is not a special tag, but just the one that Docker assigns by default to images when no other tags are specified at build time.
Now that we have the image locally, we want to run it, right? Surely enough, the command to run images is $ docker run <image>. There are mainly three ways to reference an image:
- By repository, but it works only if we have a single version of the image (ex: if I have two versions from the same repository, Docker will be confused about which I am referring to).
- By repository/tag combination, which solves the previous problem.
- By image ID, the preferred way, given that every image will always have a unique ID. Note, we can use just the first few characters from the ID and Docker will pick up the correct one.
Using the Image ID method, for our hello-world image example we will run
$ docker run bf756
Hello from Docker!
This message shows that your installation appears to be working correctly.

To generate this message, Docker took the following steps:
 1. The Docker client contacted the Docker daemon.
 2. The Docker daemon pulled the "hello-world" image from the Docker Hub.
    (amd64)
 3. The Docker daemon created a new container from that image that runs the executable that produces the output you are currently reading.
 4. The Docker daemon streamed that output to the Docker client, which sent it to your terminal.

To try something more ambitious, you can run an Ubuntu container with:
 $ docker run -it ubuntu bash

Share images, automate workflows, and more with a free Docker ID:
 https://hub.docker.com/

For more examples and ideas, visit:
 https://docs.docker.com/get-started/
We have successfully pulled and run our first Docker Image! 🎉 Let's recap all we learned so far by visualizing a repository structure and all the ways to pull or run an image in a simple way
We know how to pull and run simple images! We just scratched the Docker surface, however. Are you ready to go to the next level?

Breaking down a Docker Image
We know from last week that a Docker Image starts as a Dockerfile, which is a recipe that Docker follows to package our application. It is composed of a series of [action] [target] commands, each of which specifies a command that Docker needs to run in sequential order.
Let's take a look at a Dockerfile that deploys a simple Node.js Express server and try to understand how it works.
Note: You can download all the code from this example via this GitHub repository.
The folder structure for this example is as follows
📦docker-express-app
 ┣ 📂src
 ┃ ┗ 📜server.js
 ┣ 📜.gitignore
 ┣ 📜Dockerfile
 ┣ 📜package-lock.json
 ┗ 📜package.json
As we can see, the Dockerfile sits at the root level of my project folder. Let's now look at its content.
FROM node:11-alpine

RUN mkdir app

WORKDIR /app

COPY . .

RUN npm install

CMD ["npm", "run", "start"]
Let's go through each step one by one:
FROM node:11-alpinetells Docker to download the Docker image for Node.js version 11 running on Linux Alpine, a very lightweight Linux distribution. This will be the base image used by our container.RUN mkdir appcreates a local folder namedappat the root of the environment.WORKDIR /appchanges the working directory for all subsequent commands to the/appfolder that we created in step 2.COPY . .tells Docker to copy all the files in the current folder on my machine (mydocker-express-appfolder) in the current directory of the Docker image (the/appdirectory).RUN npm installinstalls all the dependencies that I specified in mypackage.jsonfile, in this case onlyexpress.CMD ["npm", "run", "start"]is the command that the container will run at instantiation time, in this case, thestartscript defined inpackage.json.
The next step is to build the image. As you can imagine, we have a docker build command that does just that! The standard usage for the build command is
docker build -t <username/repository:tag> <path/to/Dockerfile>
Remember that, when tagging an image, if we only provide a repository name Docker will assign the latest tag to the image by default. Let's take a look at the output.
$ docker build -t docker-express-app .
Sending build context to Docker daemon  2.013MB
Step 1/6 : FROM node:11-alpine
 ---> f18da2f58c3d
Step 2/6 : RUN mkdir app
 ---> Running in 37513fc60556
Removing intermediate container 37513fc60556
 ---> 13ee4d6cccbc
Step 3/6 : WORKDIR /app
 ---> Running in 45e51ade37c0
Removing intermediate container 45e51ade37c0
 ---> 579c23501f62
Step 4/6 : COPY . .
 ---> a3527fb353c6
Step 5/6 : RUN npm install
 ---> Running in f4ab1726f363
audited 50 packages in 0.855s
found 0 vulnerabilities

Removing intermediate container f4ab1726f363
 ---> 8f2c4645e536
Step 6/6 : CMD ["npm", "run", "start"]
 ---> Running in b5739c39b3cf
Removing intermediate container b5739c39b3cf
 ---> ac715302eade
Successfully built ac715302eade
Successfully tagged docker-express-app:latest
As we can see, each instruction is carefully followed. On each step, Docker creates a layer. Every image is built out of several read-only layers, with each layer corresponding to certain instructions in your Dockerfile. Each step builds off of the previous layer.
To do this, Docker builds a temporary container called an intermediate container from the previous layer or the base image if it is the first command. It then runs the new command on this intermediate container, saves the results as a new temporary container, and moves on to the next instruction. Some layers contribute to the image's size if they introduce new files, while others do not. The last container, which is our final image, is a combination of all the previous layers, packaged into one. Almost like an onion!
The usefulness of a layered architecture comes into play when we realize that docker caches the layers in memory during the build process. To illustrate this, let's look at a simplified view of how Docker builds images.
As we can see, Docker stores the layer in memory once it's built. On the first build of a brand new image, Dockers saves a layer and assigns it a hash based on its contents. A hash is content-dependent, so if two files differ by even just a comma, their hashes will be completely different.
But the magic happens on a second build of the first image...
$ docker build -t docker-express-app .
Sending build context to Docker daemon  2.013MB
Step 1/6 : FROM node:11-alpine
 ---> f18da2f58c3d
Step 2/6 : RUN mkdir app
 ---> Using cache
 ---> 13ee4d6cccbc
Step 3/6 : WORKDIR /app
 ---> Using cache
 ---> 579c23501f62
Step 4/6 : COPY . .
 ---> Using cache
 ---> a3527fb353c6
Step 5/6 : RUN npm install
 ---> Using cache
 ---> 8f2c4645e536
Step 6/6 : CMD ["npm", "run", "start"]
 ---> Using cache
 ---> ac715302eade
Successfully built ac715302eade
Successfully tagged docker-express-app:latest
While the first time the build took around 7 seconds, this time it was instantaneous! During this build, at each step, Docker was smart enough to remember that he already performed the same action before. This is evidenced by the ---> Using cache message that is printed after every step. If we look at the previous output, we can see also that the hashes for each layer are the same as before! Even the final image has the same hash, as none of the contents changed.
Docker checks if the hash generated by the layer is already in its cache and, if so, it will just use the cached layer instead of running all the commands again. Let's see a graphical representation of this build process.

We can now see why it's so fast to build an image again. All of its pieces are already stored in memory! By running docker history <container-id>, we can see when each layer has been built and how much space does it take in the image size (page sizes do not help with the formatting).
$ docker history ac715
IMAGE               CREATED             CREATED BY                                      SIZE                COMMENT
ac715302eade        3 hours ago         /bin/sh -c #(nop)  CMD ["npm" "run" "start"]    0B
8f2c4645e536        3 hours ago         /bin/sh -c npm install                          405B
a3527fb353c6        3 hours ago         /bin/sh -c #(nop) COPY dir:8969c211f93928b98…   1.71MB
579c23501f62        3 hours ago         /bin/sh -c #(nop) WORKDIR /app                  0B
13ee4d6cccbc        3 hours ago         /bin/sh -c mkdir app                            0B
f18da2f58c3d        14 months ago       /bin/sh -c #(nop)  CMD ["node"]                 0B
<missing>           14 months ago       /bin/sh -c #(nop)  ENTRYPOINT ["docker-entry…   0B
<missing>           14 months ago       /bin/sh -c #(nop) COPY file:238737301d473041…   116B
<missing>           15 months ago       /bin/sh -c apk add --no-cache --virtual .bui…   5.1MB
<missing>           15 months ago       /bin/sh -c #(nop)  ENV YARN_VERSION=1.15.2      0B
<missing>           15 months ago       /bin/sh -c addgroup -g 1000 node     && addu…   64.9MB
<missing>           15 months ago       /bin/sh -c #(nop)  ENV NODE_VERSION=11.15.0     0B
<missing>           15 months ago       /bin/sh -c #(nop)  CMD ["/bin/sh"]              0B
<missing>           15 months ago       /bin/sh -c #(nop) ADD file:a86aea1f3a7d68f6a…   5.53MB
All the missing layers are due to the fact that we are basing our image on the node:11-alpine base image. We can see which layers that image is composed of, sort of like a ledger, but we are only downloading the last layer. Given that we know that layers are built on top of each other as intermediate containers, we can conclude that all these missing layers are the intermediate layers that the maintainers of this Node.js image used during its build process.
However, given that hashes are content-dependent, if we decide to make some changes to any portion of the codebase, we will not be able to use all the cached layers to build an image. As a very simple example, let's just change the name of the folder that contains our server.js file from src to code.
This is our new folder structure.
📦docker-express-app
 ┣ 📂code
 ┃ ┗ 📜server.js
 ┣ 📜.gitignore
 ┣ 📜Dockerfile
 ┣ 📜package-lock.json
 ┗ 📜package.json
But when we run our docker build command, we have a different outcome.
$ docker build -t docker-express-app .
Sending build context to Docker daemon  2.013MB
Step 1/6 : FROM node:11-alpine
 ---> f18da2f58c3d
Step 2/6 : RUN mkdir app
 ---> Using cache
 ---> 13ee4d6cccbc
Step 3/6 : WORKDIR /app
 ---> Using cache
 ---> 579c23501f62
Step 4/6 : COPY . .
 ---> f10aa38c82f7
Step 5/6 : RUN npm install
 ---> Running in 2fa89543e5ea
audited 50 packages in 0.829s
found 0 vulnerabilities

Removing intermediate container 2fa89543e5ea
 ---> 1b1c5a70b2b7
Step 6/6 : CMD ["npm", "run", "start"]
 ---> Running in 4769083b9b29
Removing intermediate container 4769083b9b29
 ---> 5d9be595c131
Successfully built 5d9be595c131
Successfully tagged docker-express-app:latest
As we can see, Step 4 changes, as the files that are copied are not the same anymore. From there, all the steps require to be built from scratch because they are built from different intermediate containers, hence different hashes. Let's visualize also this build process.
We can now compare the history of this new image with the previous history. There, we can confirm that the last three layers have been updated more recently than the first 3 layers.
$ docker history 5d9be
IMAGE               CREATED             CREATED BY                                      SIZE                COMMENT
5d9be595c131        About an hour ago   /bin/sh -c #(nop)  CMD ["npm" "run" "start"]    0B
1b1c5a70b2b7        About an hour ago   /bin/sh -c npm install                          405B
f10aa38c82f7        About an hour ago   /bin/sh -c #(nop) COPY dir:672da4b923f856b86…   1.71MB
579c23501f62        3 hours ago         /bin/sh -c #(nop) WORKDIR /app                  0B
13ee4d6cccbc        3 hours ago         /bin/sh -c mkdir app                            0B
f18da2f58c3d        14 months ago       /bin/sh -c #(nop)  CMD ["node"]                 0B
<missing>           14 months ago       /bin/sh -c #(nop)  ENTRYPOINT ["docker-entry…   0B
<missing>           14 months ago       /bin/sh -c #(nop) COPY file:238737301d473041…   116B
<missing>           15 months ago       /bin/sh -c apk add --no-cache --virtual .bui…   5.1MB
<missing>           15 months ago       /bin/sh -c #(nop)  ENV YARN_VERSION=1.15.2      0B
<missing>           15 months ago       /bin/sh -c addgroup -g 1000 node     && addu…   64.9MB
<missing>           15 months ago       /bin/sh -c #(nop)  ENV NODE_VERSION=11.15.0     0B
<missing>           15 months ago       /bin/sh -c #(nop)  CMD ["/bin/sh"]              0B
<missing>           15 months ago       /bin/sh -c #(nop) ADD file:a86aea1f3a7d68f6a…   5.53MB
Running our newly built image
We now have a new image built and ready to be run as a container. As we previously mentioned, we can run images by simply providing an image ID as an argument to our docker run function, so let's do that.
$ docker run ac715302eade

> docker-express-app@1.0.0 start /app
> node src/server.js

Example app listening at http://localhost:3000
Let's follow the link and...
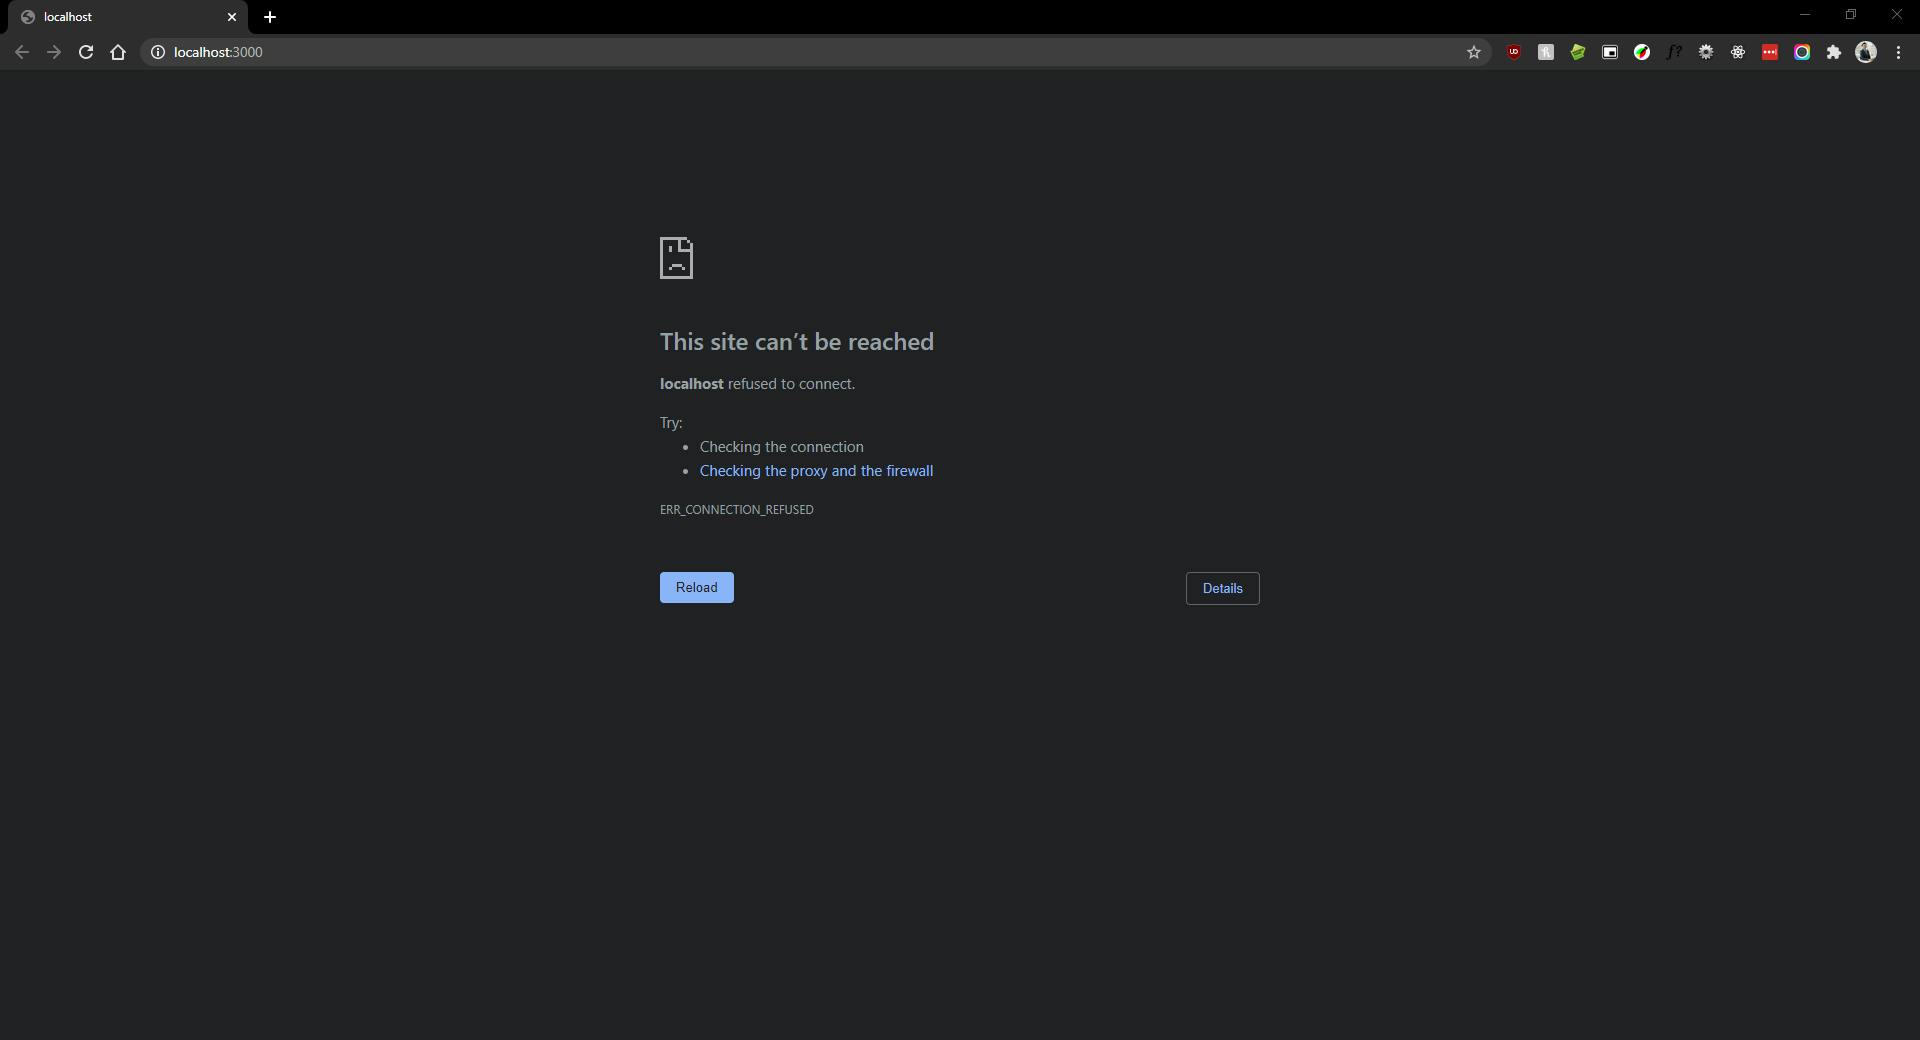
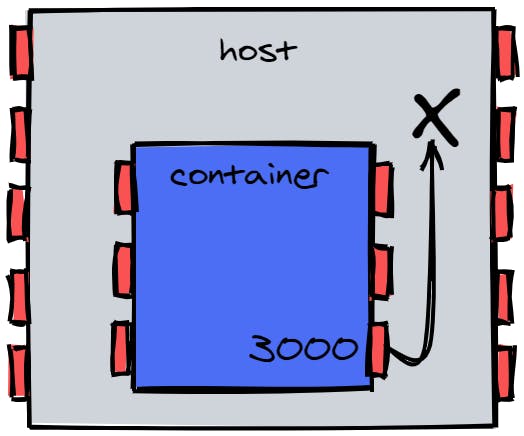
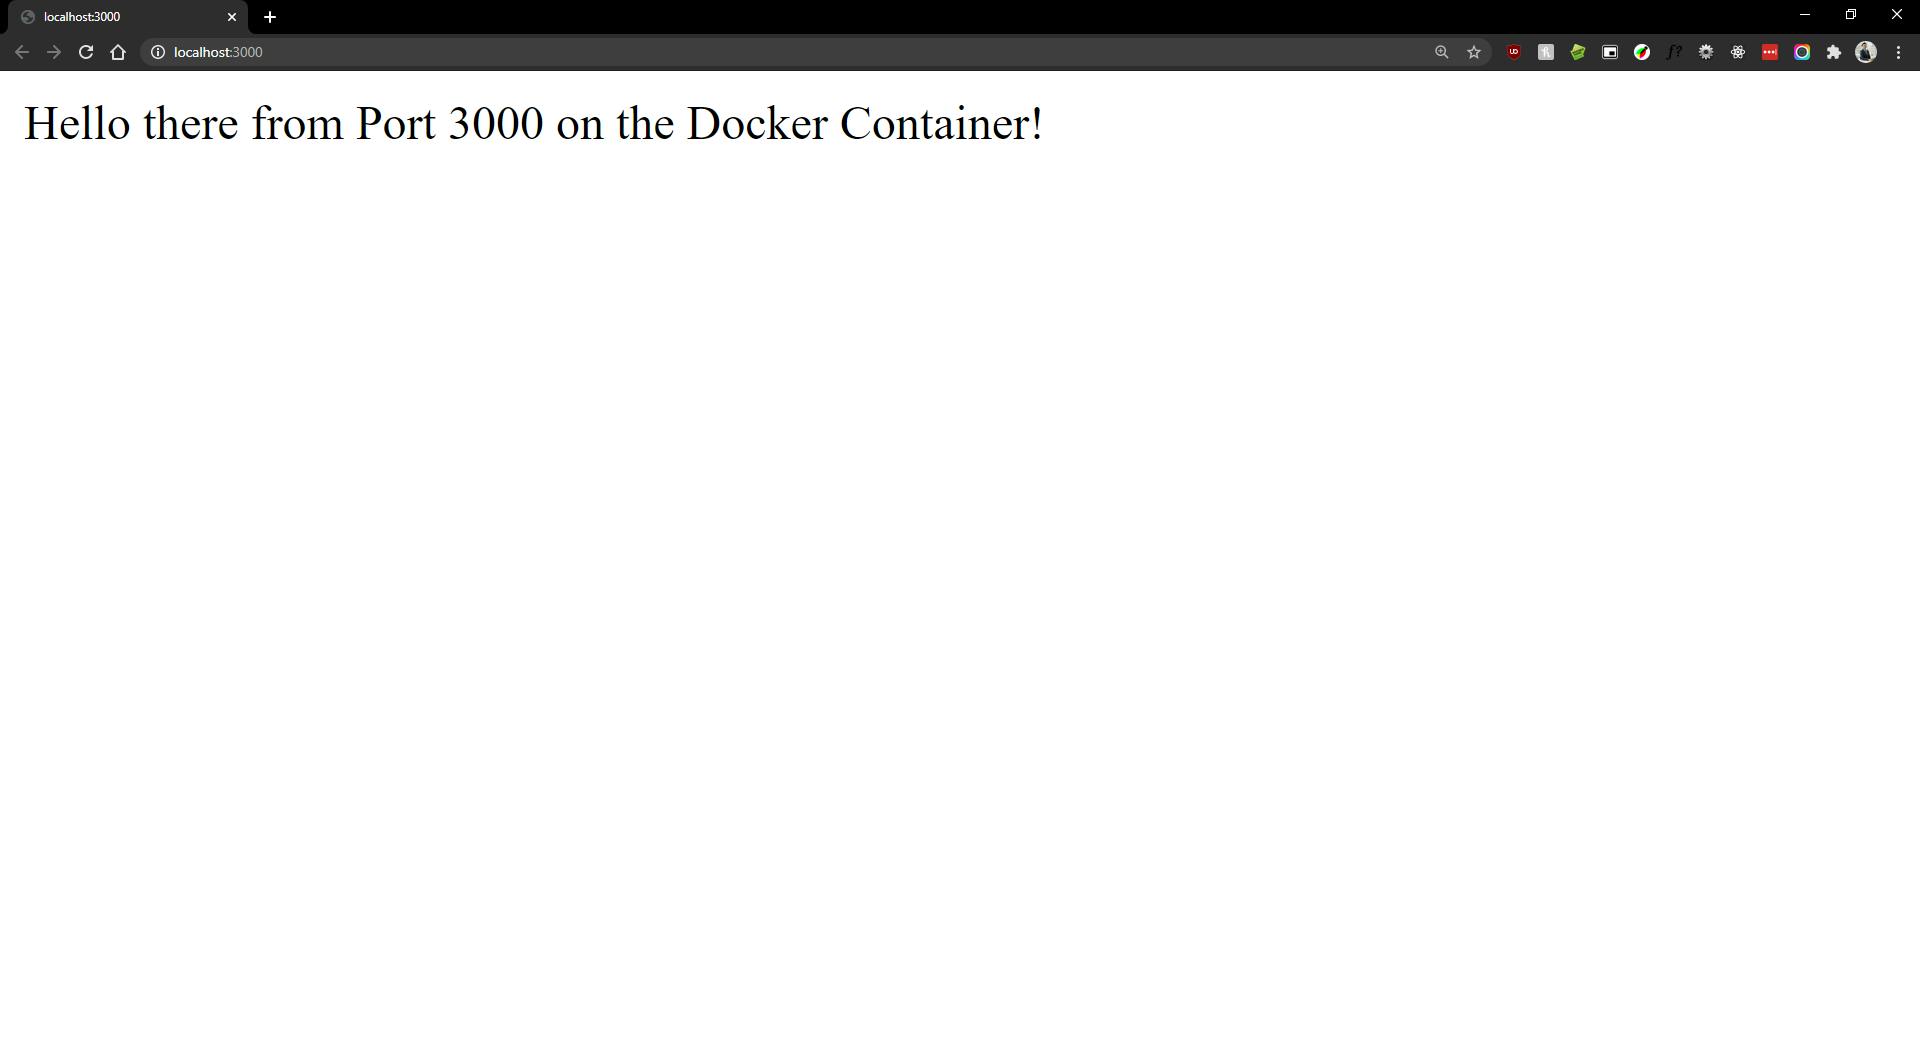
If you looked at the code in the src folder, we know it's a simple Express app that serves a plain Hello World type of message on port 3000. That's also what the terminal seems to do. But why we can't reach our site? Let's think again about what containerization means.
Our app is running on its own private space along with our host OS processes. The container is isolated from the other processes and that means that also all the containers port are isolated from the host's ports. By default, Docker does not publish any of the container's ports to the host. We can understand why the site can't be reached, now. It is because what we are connecting to is Port 3000 on the host, and that port is not currently serving anything.
To ensure that the application running inside the container is going to serve a port that we can reach from the host machine, we need to actively bind the necessary ports to the host's ports. There are a few ways to perform port mapping in Docker, but the most straightforward one is to explicitly publish a port using the -p or publish flag when issuing the docker run command.
Since we did run a container with our previous command, we have to manually stop the running process. For this, we can open a new terminal and explore the currently running containers with docker ps.
$ docker ps
CONTAINER ID     IMAGE     COMMAND                  CREATED           STATUS          PORTS    NAMES
2a9465cdf730     ac715     "docker-entrypoint.s…"   10 seconds ago    Up 8 seconds             flamboyant_haslett
As you can see, this command shows us the running containers, along with their ID, associated image ID, status, mapped ports, and a randomly generated name. We can provide a more meaningful name at runtime using the flag --name, to track more efficiently which services we are running. To stop the running container, simply issue the command docker stop along with the container name or ID.
$ docker stop 2a946
2a946
If the ID is returned, the container has stopped. We know that our Express app is listening on Port 3000, so let's try to run it again, this time with the correct port mapping.
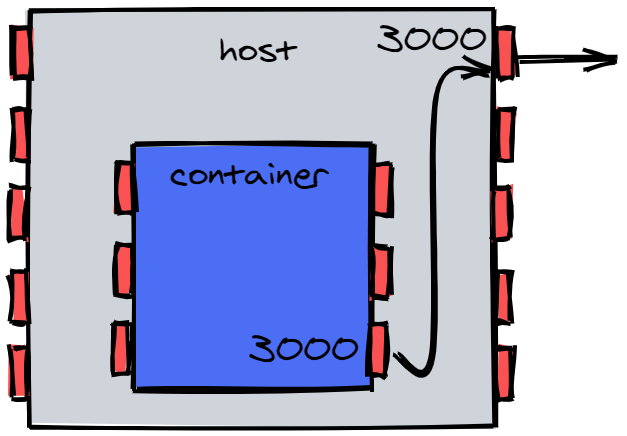
The -p flag takes an argument that has the form <hostPort>:<containerPort>. If for example, we want to map Port 3000 of the container to Port 3000 on the host, we can simply say
docker run -p 3000:3000 <containerName>
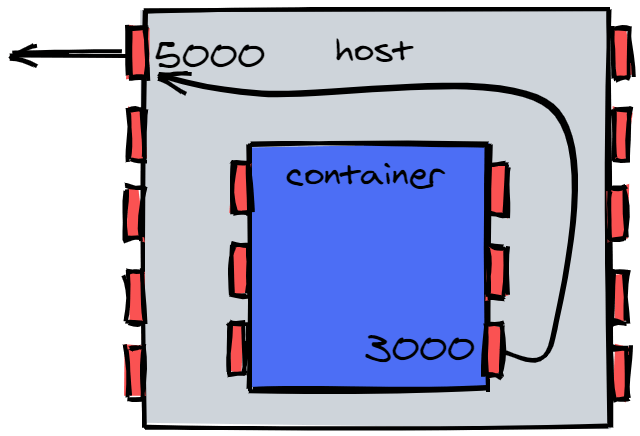
Something to mention is that ports don't have to match between container and host. I can map the container's Port 3000 to my host's Port 5000, and as long as the container is serving content on its own Port 3000, I will be able to access it through the host's Port 5000.
Do not worry if this seems hard to grasp. Networking in Docker is a wholly different can of worms that we will explore in much greater detail in the next post. For now, let's run our container the correct way.
$ docker run --name express-app -p 3000:3000 ac715

> docker-express-app@1.0.0 start /app
> node src/server.js

Example app listening at http://localhost:3000
Following the link now, will show the anticipated output.
Next steps
Congratulations! You ran your first Docker container, built your first image from a Dockerfile, understood the layered architecture, and dipped your toes with networking and port mapping. That deserves a round of applause!

Next time we will go even deeper and talk about Docker volumes, container networking and the magic of Docker compose, setting up the stage for the final entry in this Docker tutorial with deployment and orchestration options on AWS using ECS, Fargate, and Kubernetes!
You can keep in touch with me via Twitter and let me know what you think about this guide. I hope you liked our second hike on the Docker mountain, and stay tuned for next week's entry!