

The Hitchhiker's Guide to the Containers: A Foolproof, Hands-on Docker Tutorial (Part 1)


For a beginner, it is not an easy task to understand Docker. I will admit that I have struggled with using and understanding containers for a long time and I still have a lot to work on. There is a ton of subtleties that goes into solidly grasping the concepts behind Docker, why it is so revolutionary, and why even a budding programmer might benefit from learning it and using it.

This is my humble attempt to channel hours and hours of headaches, despair, and a-ha! moments into a beginner-friendly, digestible format. This is the first in a series of articles, and I hope it will give you a headstart in your Docker journey!
Some history
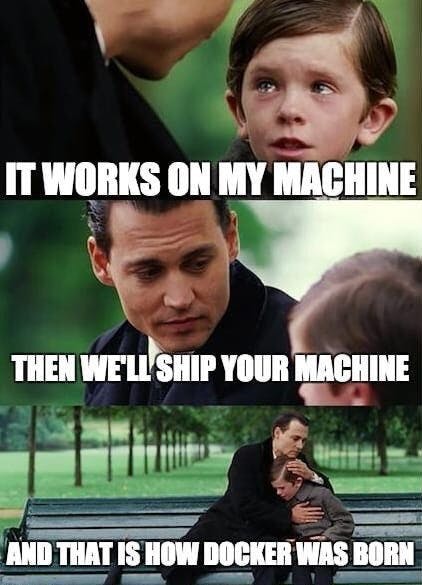
The typical way of writing software was simple. A developer works on his local machine, installing a bunch of packages, setting up the environment, etc. Once the necessary code was in good shape, our dev friend shares the code to the ops folks, and... it doesn't work.
Ops: Your code doesn't work.
Dev: Hey it worked on my machine!
Ops: What version of
XXXdo you run?Dev: I have no idea, man...
As you can imagine, a very long time was spent troubleshooting dev environments instead of shipping features and improvements.
The solution found was in hypervisors and Virtual Machines (VMs). With VMs, you can package and ship a fully configured operating system along with your code, and spin up as many development and test environments as you see fit with it. Coding becomes just booting up a VM, configuring the environments as you need them, develop software, test it, and your job is done! But how does all of this work? What are VMs? Let's look at the architecture of a computer running VMs.

There are a lot of terms that you might not know, so let's go through them. The infrastructure is the computer hardware, meaning CPU, RAM, SSDs and hard disks, motherboards, and anything else is part of the physical components of the host machine. The Host OS is the operating system that is installed on the infrastructure. As an example, if you were to purchase a MacBook, the aluminum shell and all the components are part of the infrastructure, while MacOS is the Host Os.
The hypervisor is a piece of software that handles the creation of Virtual Machines. Each of these VMs can run their independent process, as they believe they are using the hardware resources from the infrastructure. In reality, the hypervisor allocates hardware from the pool of resources that the infrastructure makes available. In simplest terms, it creates a virtual representation of portions of the Host Machine hardware and lets Virtual Machine run on those, managing the resources.
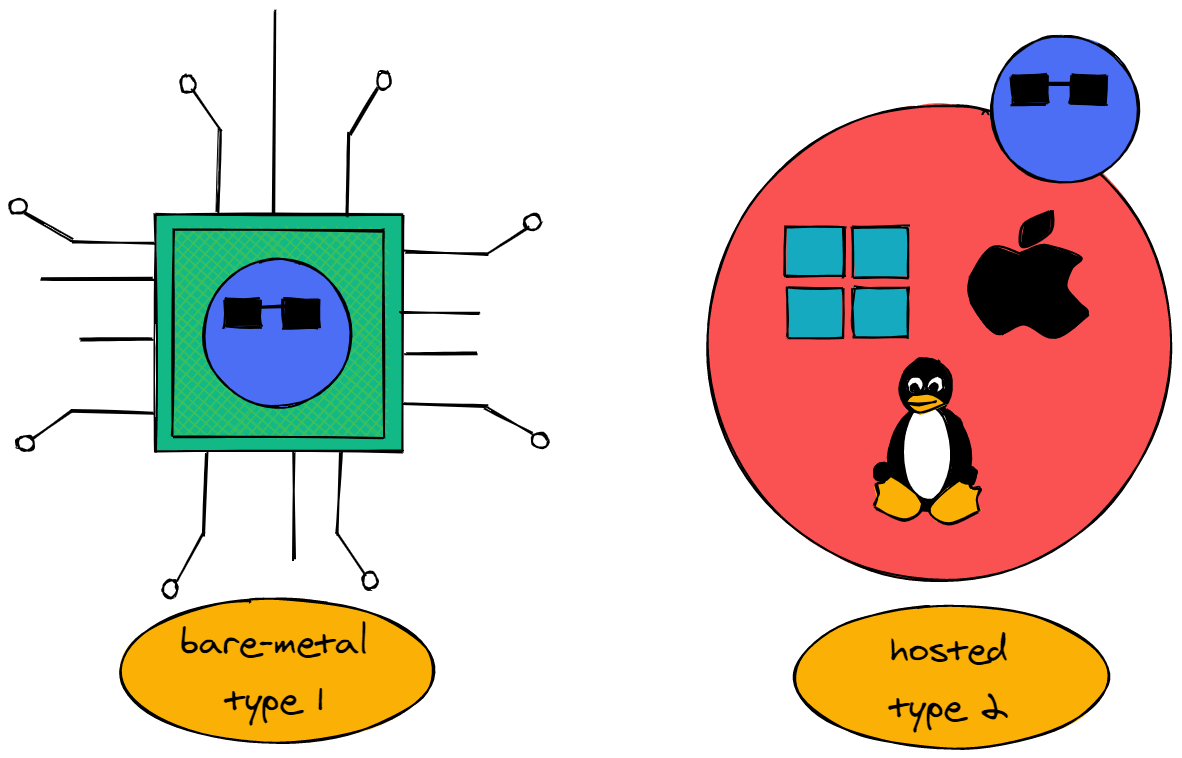
As you can see from the diagram, are two types of hypervisors, depending on where they sit in the system architecture.
Bare-Metal Hypervisors (Type 1):
The hypervisor software is installed directly on the hardware and embedded in its components. In this case, there is no Host OS on these infrastructures. These are the most common type of hypervisors used in production environments, as they are more secure and have a higher performance by being so close to the machine level.
Hosted Hypervisors (Type 2):
The hypervisor software is installed on an operating system. If you have played with VMs, this is most likely the type of hypervisor that you have used. Simply think of Oracle VirtualBox, Parallels Desktop, VMWare Fusion, or any of the major VM providers.
The important point to note here is that, while a hypervisor provides all the resources and virtualized hardware, it does not provide an operating system. This is where the Guest OS plays its part, as the OS that is running on the VM. These are fully-fledged OS, including all the additional pieces of software needed to make the system run. This introduces a ton of additional bloat to the process and reduces the number of VMs that a single host can run.
Think about installing any OS. A fresh installation of Windows, for example, also comes with all the usual additional applications and supporting software. I doubt that our production-grade Nginx server will make plenty of use of a shiny copy of Paint 3D.
Enter Docker
A container solves the timeless problem of "IDK, man. It works on my machine" and the performance overheads of VMs by providing you a portable, replicable image of your development environment that can run on any OS. When an application is containerized, it is bundled with all of its dependencies. In this way, if I want to run the application on a different machine, I don't need to install anything else other than Docker, as all that makes my application tick comes embedded with the Docker Image.
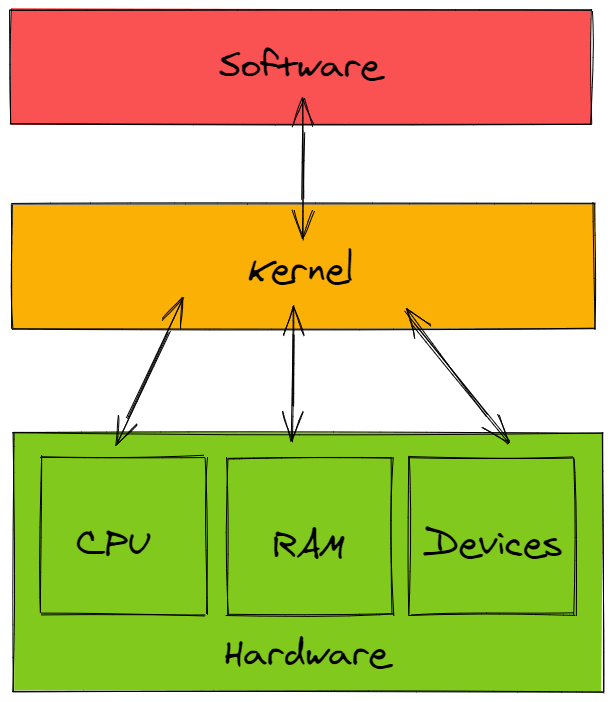
The reason why this works is that Docker runs its containers directly on our machine's kernel. The kernel is the very low-level program that has complete control over both software and hardware in your computer, allowing the two to communicate.
All of the Docker container's processes run along with the main operating system's processes, albeit in a logically isolated fashion. This isolation is made possible by utilities in the Linux kernel, specifically LXC (LinuX Containers), cgroups (control group), and namespaces. The specifics of how these work are a little tricky, but we will explore them in a future tutorial.
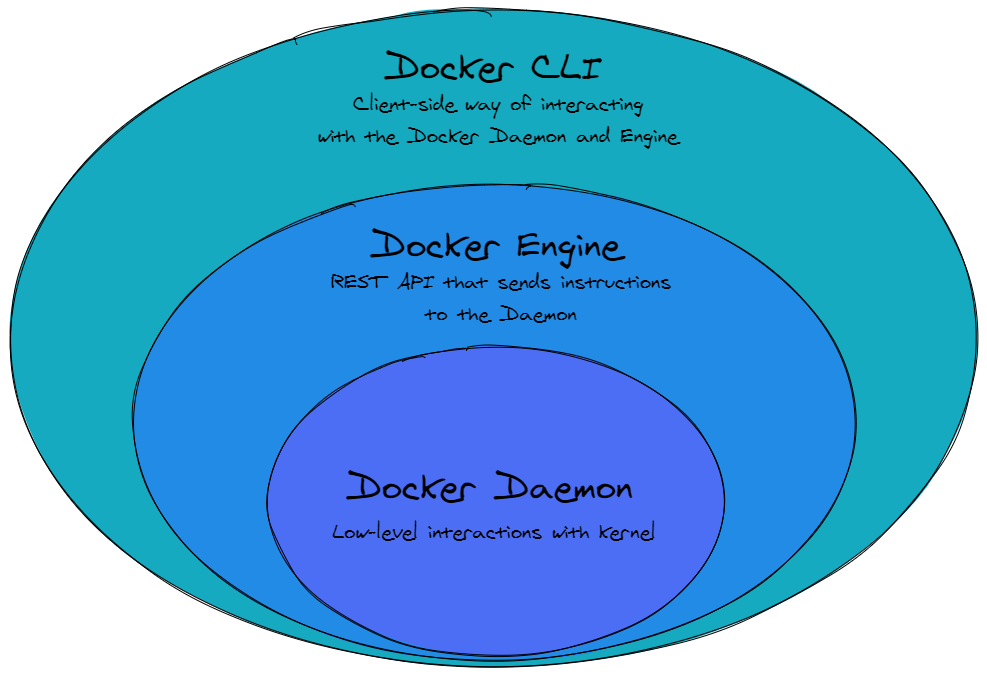
Docker is built off of these utilities, extending them and making them easy to use with a high-level API, called the Docker Engine. The Docker Engine is a REST API that can be accessed via HTTP or, most commonly, through a command-line interface. It sends instructions to the Docker Daemon, a constantly running background process that manages every interaction between Docker containers and the machine's kernel.
Comparing Docker with VMs
Let's look again at the VM architectural diagram and let's compare it to how Docker does its things.
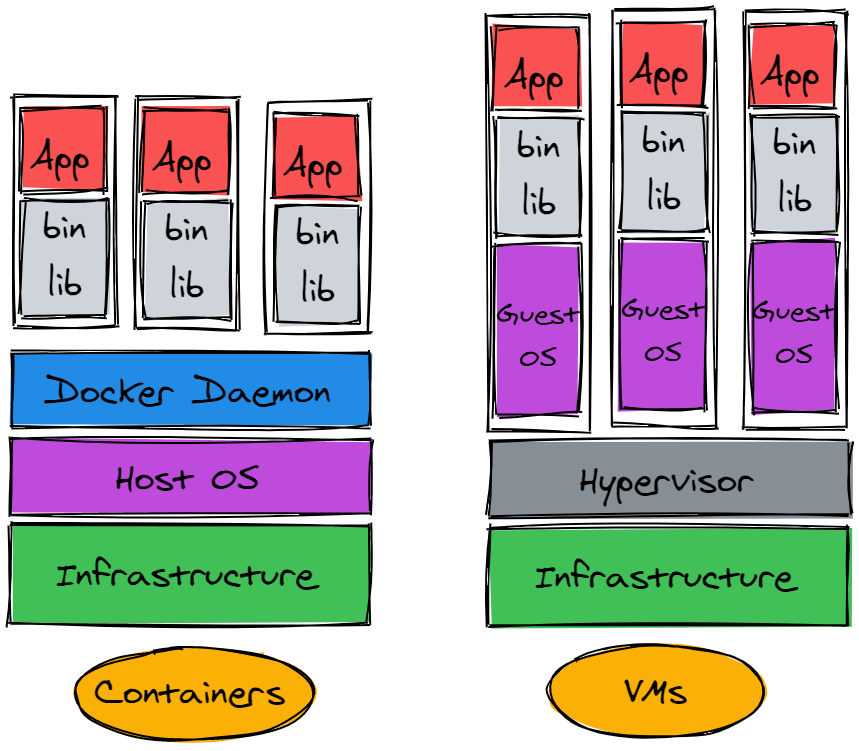
This is where Docker has an advantage over VMs. Given that, as we explained before, the containers use the kernel of the host to run their processes, there is no overhead to run a container. A container has no kernel booting to do, it uses only the processes that are necessary to run the containerized application, it stops whenever my application stops and does not occupy hardware resources while not in use.
TL;DR
Docker is a quick way to package applications in the environment that they were developed in, making sure that they can run no matter the underlying infrastructure, configuration, or OS.
Even more TL;DR
Some Docker jargon
We explained what Docker is why it is great, but you surely have heard of Dockerfiles, Docker images, Docker containers, and maybe others. Let's clarify what those things mean.
Docker Image
Docker images are read-only files that are to build containers. They include everything that the containerized process needs to run, such as source code, dependencies, runtimes, and objects. Most crucially, it provides a private filesystem to the container. Images are lightweight, portable, and can be used to deploy applications quickly and at scale. Every image is built from a Docker-specific script called a Dockerfile.
Dockerfile
A Dockerfile is a recipe that provides mostly clear and sequential instructions on how to build an image. A Dockerfile is composed of a series of [action] [target] commands, each of which creates a new layer. We will cover layers in a later installment of this series, but for now, we can think of these as building blocks that can be individually cached (i.e. saved to memory) for future builds.
Docker Container
Once we build an image from a Dockerfile, we can finally deploy it as a container. Containers are nothing more than instances of Docker images. Multiple containers can run at the same time on the same machine and multiple containers can be instantiated from the same Docker image. Containers live for the time it takes for their processes to run or until they fail.
Combined with an extremely fast start time, we can see why they are valuable in environments that need to scale quickly. We can start as many containers as our underlying infrastructure can handle or as much as our manually allocated resources allow and we can get rid of them just as quickly.
Docker Registry
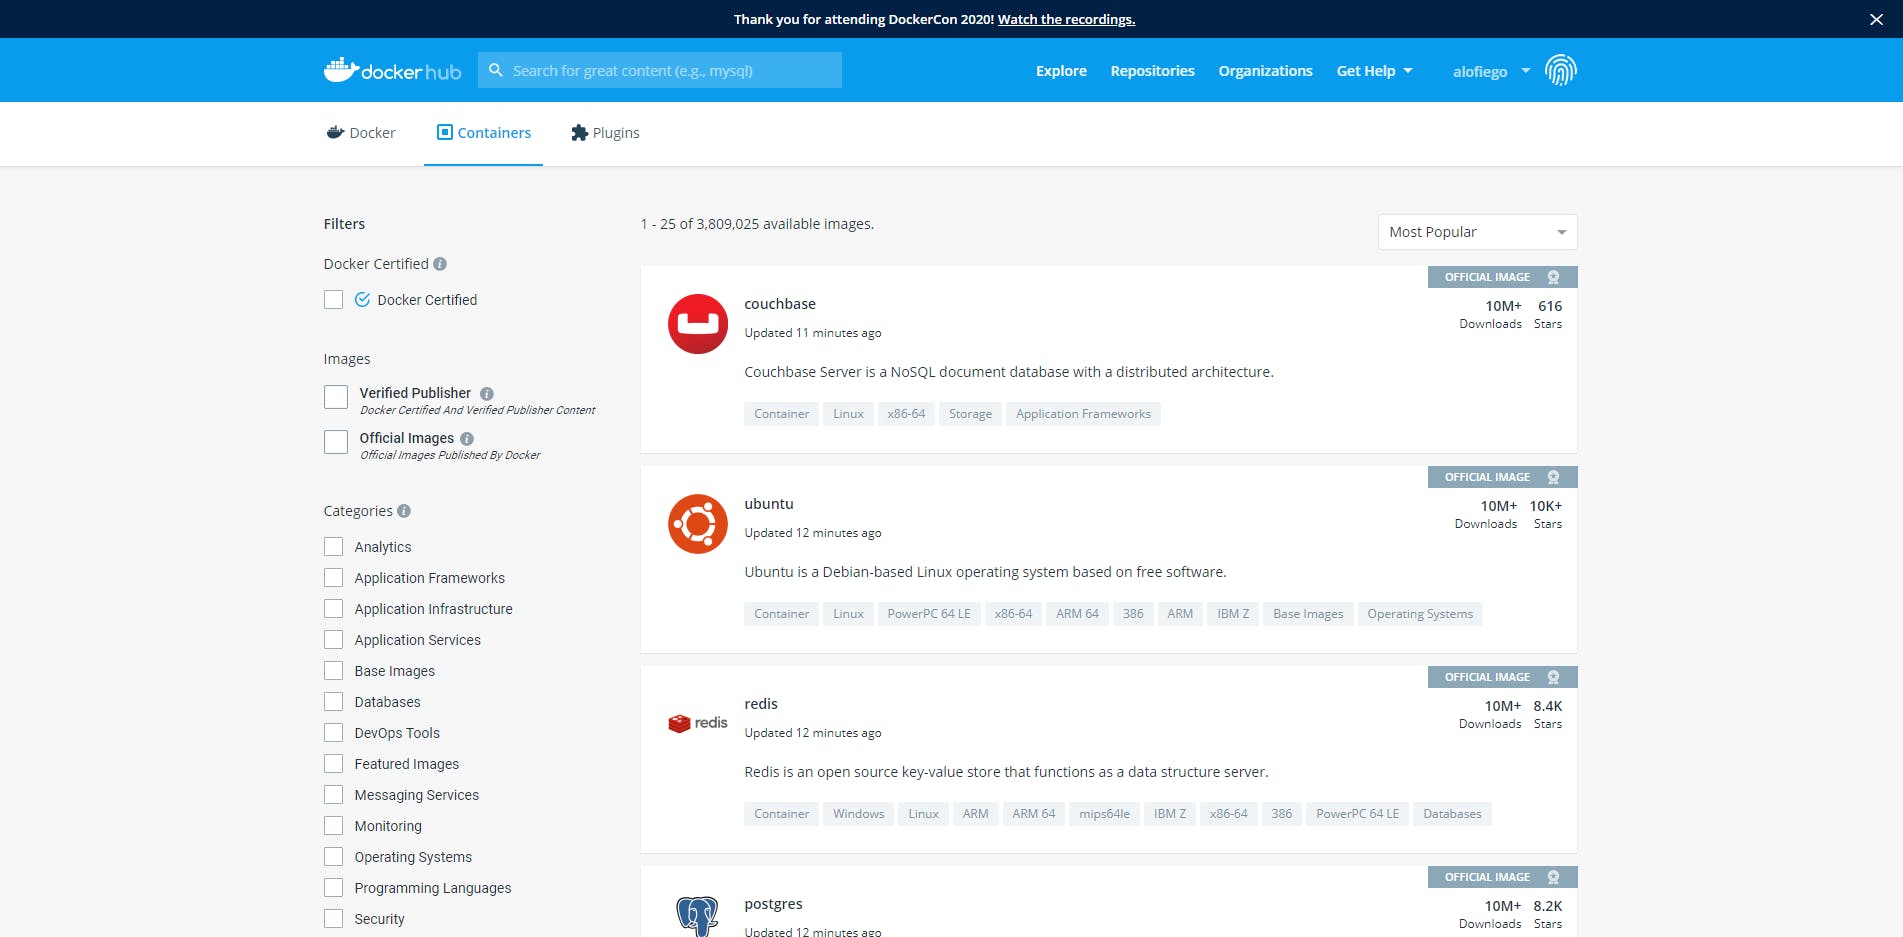
If we want to control every detail of our services on our own, we can write a Dockerfile that specifies every single step of the way to get there. But in most use cases we might be interested in running pre-built images of services that we use daily. For that reason, we can browse Docker Hub, an online registry of pre-built images of various software, from commonly used applications like databases (MySQL, Redis, Postgres, etc...), web servers (Nginx, Apache), or CMS (WordPress) to development environments in most languages (Python, Node.js, Java, etc...).
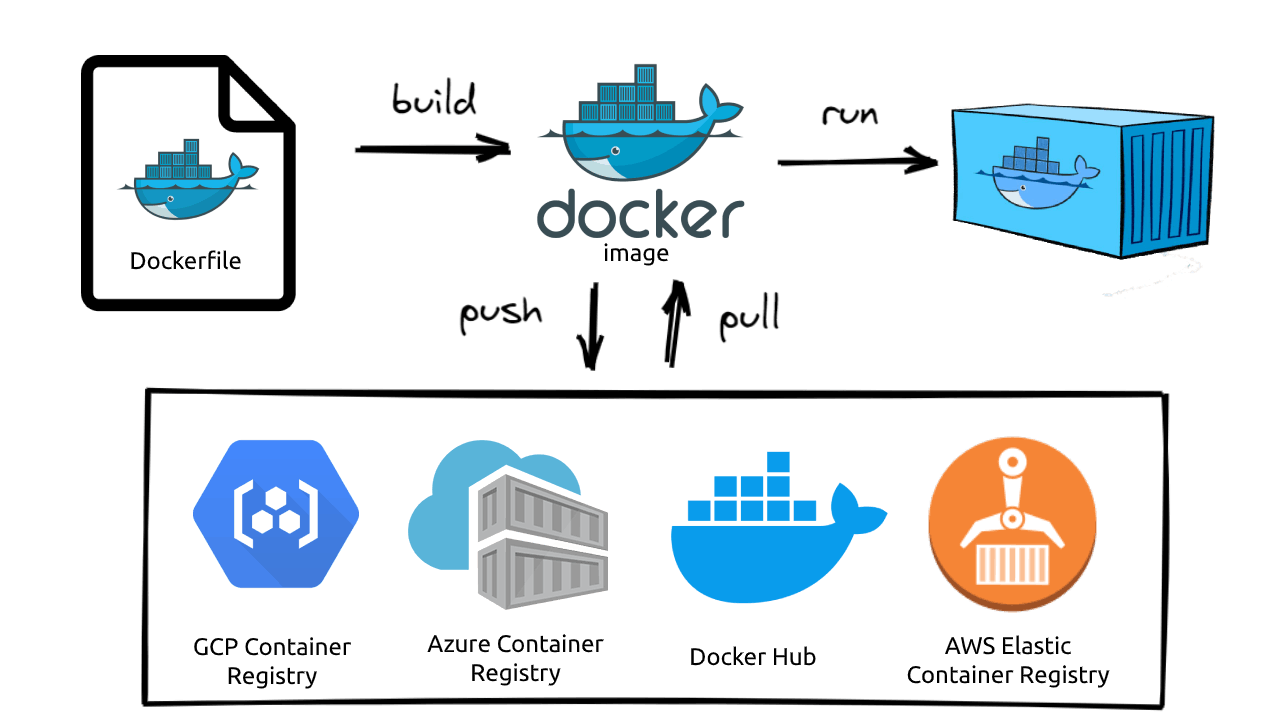
The images that you build through your Dockerfiles can be pushed to the various registries, either to DockerHub if we want to make them publicly available or registries like AWS Elastic Container Registry, Azure Container Registry, or GCP Container Registry if we want to keep them private. If we want our images to be uber-private, we can also host our private registry by running a local instance of the Docker Registry, which is available as a Docker image on Docker Hub.
We have now a better idea of the basic building blocks of Docker. We can also identify the cycle of Docker containers, from creation to instantiation.
Next steps?
Whew! That was already a lot of information to digest! Make sure you understand the underlying concepts of Docker and why so many developers love the fact that it is in this world. In Part 2 of this series, we will start getting our feet wet with the Docker CLI, pull a few images from Docker Hub, and get experience with properly running containers in various use cases.
For now, if you want, keep in touch with me via Twitter and let me know what you think about this guide. I hope you liked your first steps with Docker because it's gonna be a hike!